ORION’S BELT
Saturn’s Eye is a fictional company in the future that have acquired the proper material and technology to create artificial wormholes using a particle accelerator called Orion’s Belt. This is the official scientific report detailing the various tests con ducted on their machine.
This project is an info-graphic based report that details the various steps taken to create the Orion’s Belt. The report makes extensive use of diagrams, graphs and charts to visually explain how the machine operates. Due to the extensively scientific nature of the report, the project features an explanation and visualizations of wormholes and particle accelerator as a base understanding.
PROCESS WORK
SKETCHES
The first step of the process was to start sketching ideas for what the overall report would look like. I started by sketching some smaller components that would be included throughout the report.
Following this, I created some rough sketches to map out how the animations in Adobe Aero would look like. This was to figure out what assets to create and what animations could be applied to them.


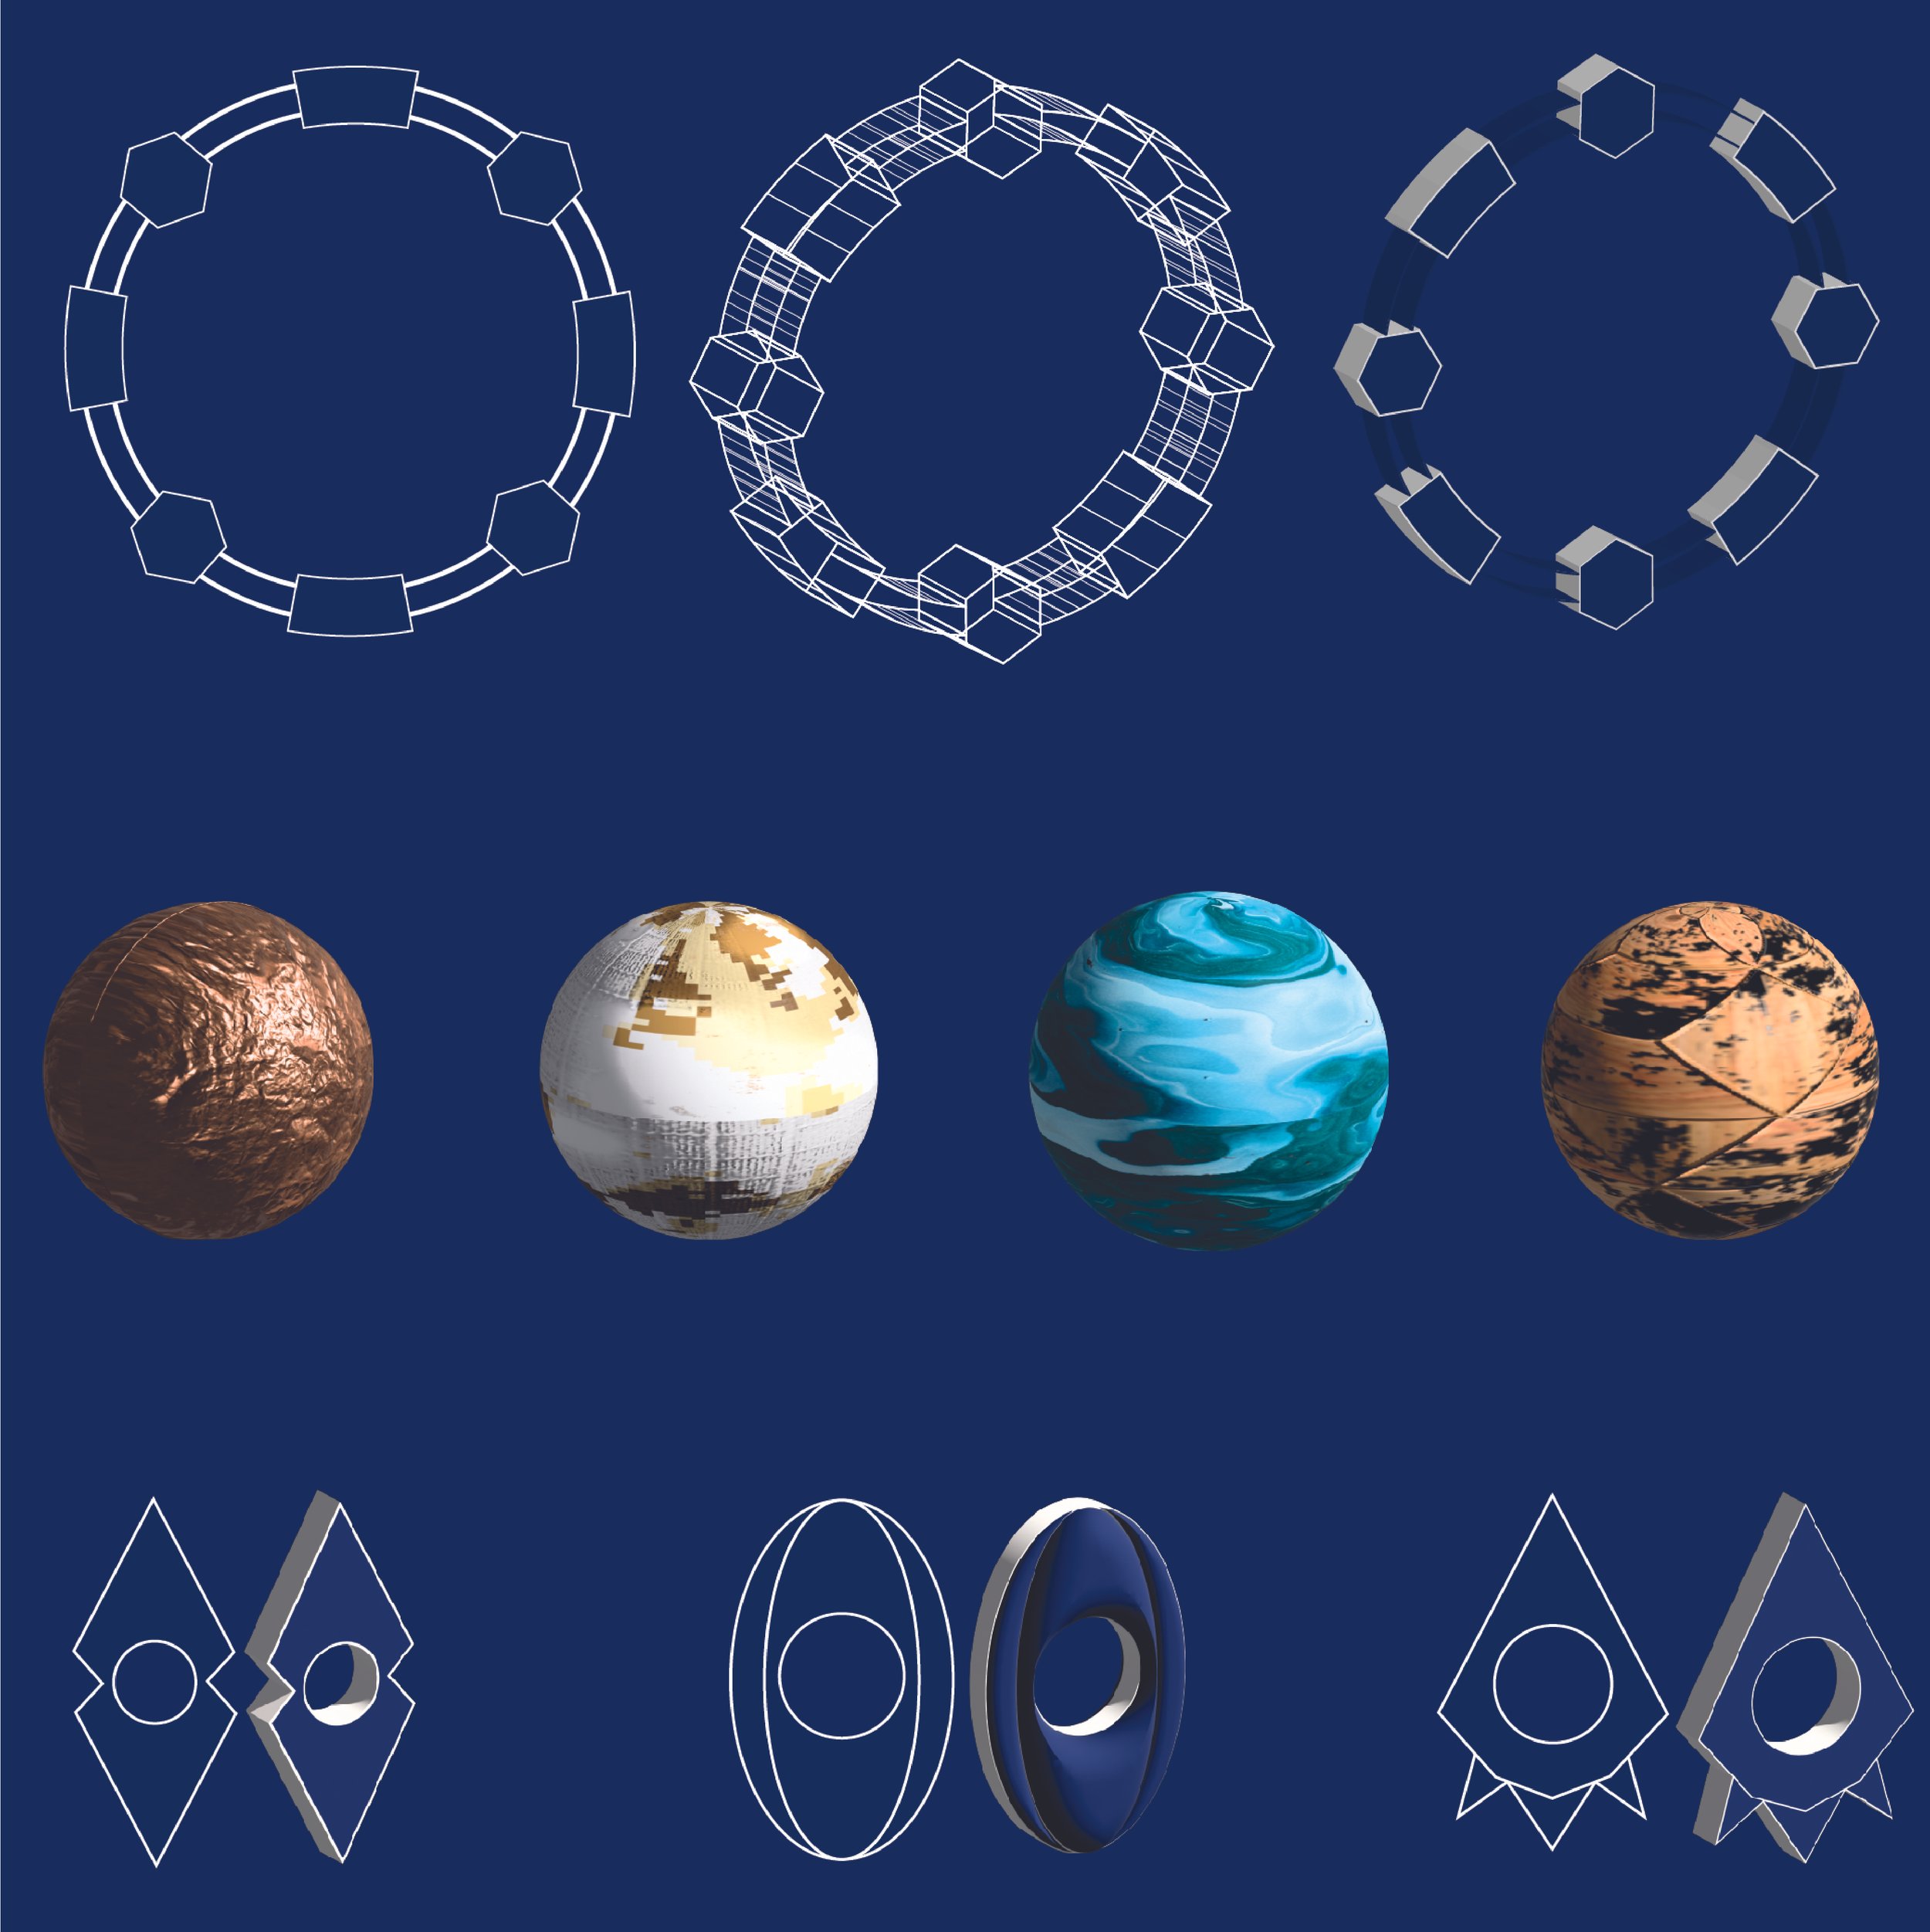
The first step was to create a series of wireframe illustrations through Illustrator’s 3D classic feature. The wire-frames give the overall report a more robust and futuristic look.
The wireframes were primary used in scientific diagrams, or in data visualizations.
WIRE FRAMES
3D ASSETS
Using Illustrator’s 3D and Material’s Effect, several 3D assets were created which were used in the report and for Aero, and AR software from Adobe. Aero was used to create AR animations using 3D assets created in Illustrator and exported as GLTF files.
ADOBE AERO
Adobe Aero is a relatively new tool that allows the user to import 3D assets and apply animation features to create interesting visuals. The animations themselves aren’t anything overtly complicated, but it did have enough features to combine and make something unique.
For my project, I needed to first think about how I could use Aero to showcase my work. I created 3 animations to showcase different aspects of the projects. Each animation was part of a text and image description, but a QR code could allow the viewer to see the concept in movement with the animations created in Aero.
The first animation is a simple solar system with a Star and planets in Orbit.
The second animation is the Orion’s Belt in movement creating a wormhole.
The final animation is a planet colliding into another to create an explosion.
ILLUSTRATOR 3D ASSETS
First step was to create the assets in Illustrator. Since the models didn't require and specific details, the 3D models were created and rendered in Illustrator for simplicity, but also to allow the ease of adjustments if needed.
Illustrator is also helpful in creating multiple smaller assets, specially if an animation requires a large amount of assets. The render time and processing power is lower with Illustrator compared to a 3D modeling software like 3D Substance.
ORION’S BELT 3D DESIGN

First using the Pen and the Shape Builder tool, various shapes were used to create a 2D model of the Orion’s Belt.
The group is then selected. Then in the Effects panel, 3D and Materials, then Extrude to create a 3D model. Extrude adds depth to the 2D model by increasing its width.
The 3D model is then exported using the Asset Export. This can be used to convert the model into a GLTF file.
STAR & PLANET 3D DESIGN
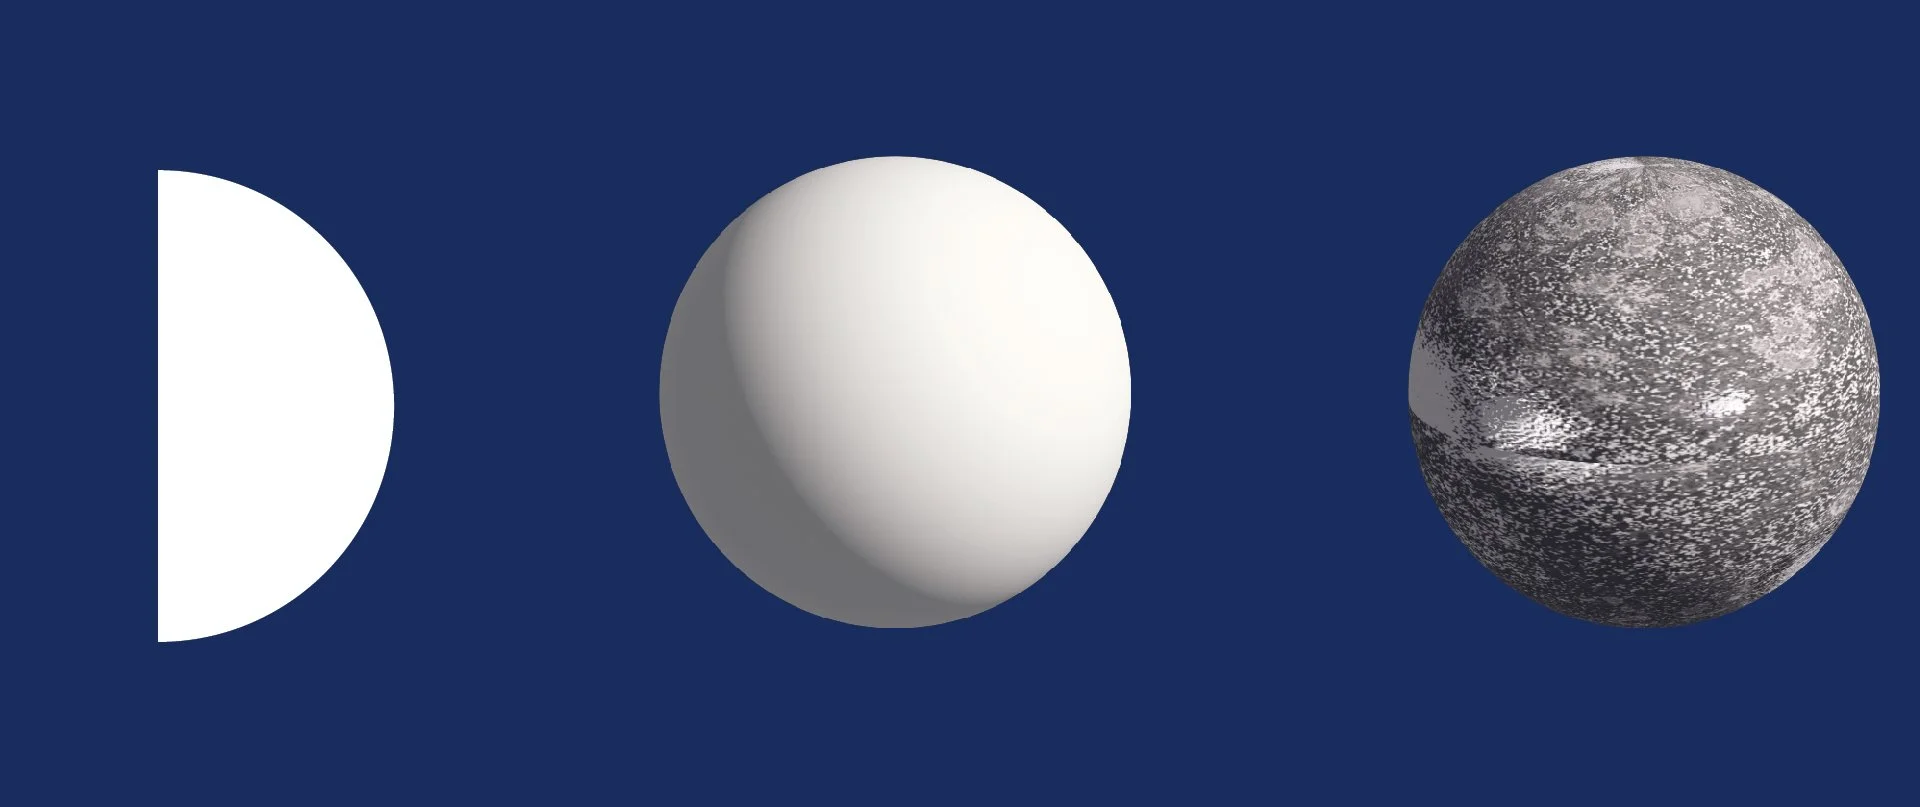
To create the stars and planets, we use the shape tool to create an circle. From there we remove 1 out of the 4 anchor points to create an semi-circle.
With the shape selected, we go to the Effects panel, 3D and Materials, then this time, we use Revolve to create a 3D model. The Revolve feature, takes the semi circle and extends the shape in a 360 to create a sphere.
In the Materials section, we change the material from a plain color to a different texture. The asset is then exported into a GLTF file. We create multiple planet assets with various textures found in the Materials section of 3D and Materials
WORMHOLE 3D DESIGN

Similar to the stars and planets, to create the wormhole, we use the Pen tool is used to first draw a curved line. The curvature and shape of the line is determined by how the user would like the final asset to look like, various different shapes can be created.
With the line selected, we repeat the process by going to the Effects panel, 3D and Materials, then this time, we use Revolve to create a 3D model. The Revolve feature, takes the curved line and extends the line in a 360 to create a tunnel like structure, this acts as one half of the wormhole.
In the Materials section, we change the material to a different texture. The asset is then exported into a GLTF file. In Adobe Aero, we import and duplicate the file, rotate it so the smalled ends of the tunnel meet to create a full 3D wormhole.
PLANET’S ANIMATION
We start by importing the GLTF file of the Sun into Adobe Aero. The Sun falls in the direct center, and serves as the anchor point. Then we import the planet assets and adjust their spacing from the Sun.
In the Behaviors panel, we start by selecting Scene: Start. [This plays the animation as soon as the AR is opened] Then we select a single planet, then in Behaviors, we select Action: Orbit. We select the Sun as the anchor, followed by the direction of the rotation direction.
We repeat the animation sequence for the other planets, adjusting the speed and direction to create a more dynamic animation.

ORION’S BELT ANIMATION
We start by importing the GLTF file for the Orion’s Belt into Adobe Aero. First we import the 3D tunnel Asset and, the tunnel is duplicated and rotated and put together into a group to create a wormhole. Then we import the Orion’s Belt, duplicate it and position it on opposite sides of the wormhole. The Assets are then grouped.
In the Behaviors panel, we start by selecting Scene: Start. We select the wormhole group asset, then in Behaviors, we select Action: Spin, then we select the axis we want it to spin on. Then we repeat the process with the Orion’s Belt group, but set the Spin to go counter clockwise to the wormhole.

PLANET COLLISON ANIMATION
We start by importing the GLTF files of 2 Planets. We adjust the size and position relative to each other.
In the Behaviors panel, we start by selecting Scene: Start. We select the smaller planet first, then Action: Move to with the Bigger planet as the selected Location. Upon connection, a second Scene is started with the planet becoming bigger. For this Scene: Scale is used, with the Scale Multiplier set to x2. This enlarges the planet to completely cover up the smaller planet.

QR CODE & ANIMATION VIEW

Star & Planet Animation

Orion’s Belt Animation

Planet Collison Animation
